开发VIVID插件和开发原生Unity应用大体相同,只需要注意以下几点
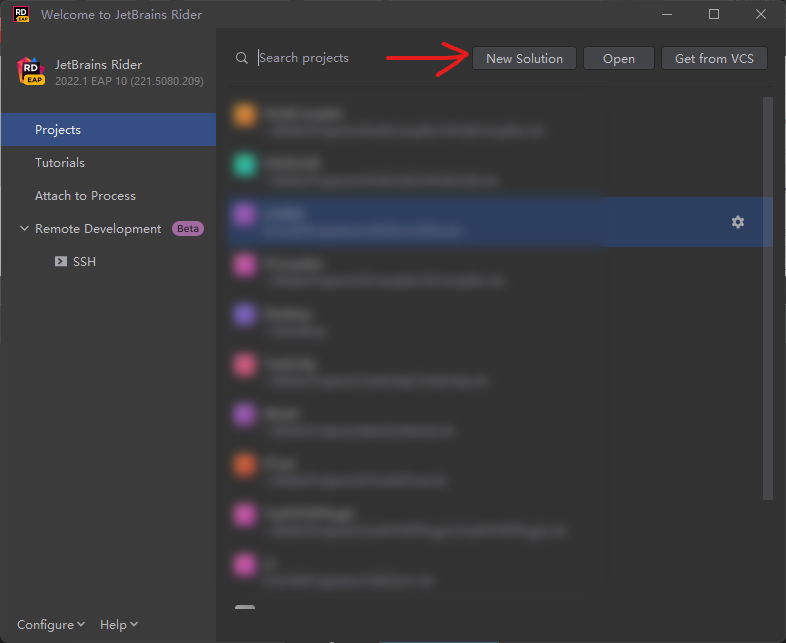
首先新建一个工程,用什么编辑器都可以,这里用的IDE是Rider
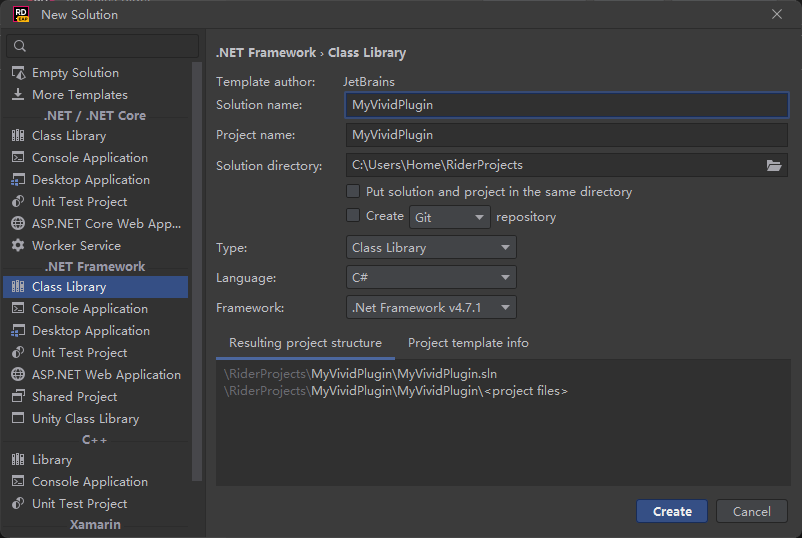
然后新建一个.Net Framework的Library工程,这样的工程可以导出Unity能加载的DLL文件
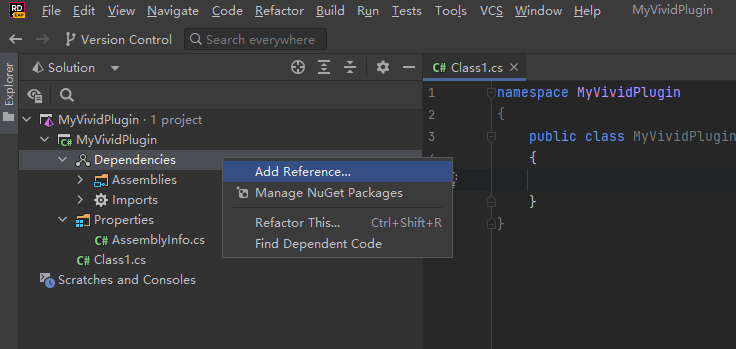
然后在工程目录下的Dependencies上右键->添加引用
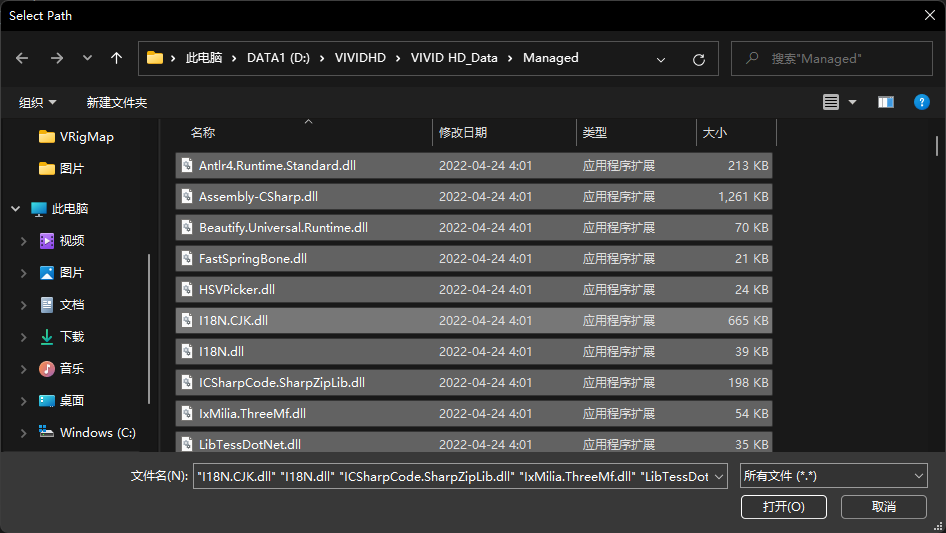
选择 Add From
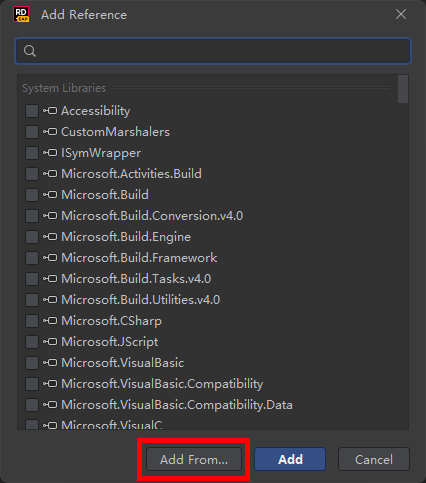
进到VIVID的这个目录里,全部选中 ( %VIVID目录%\VIVID HD_Data\Managed )
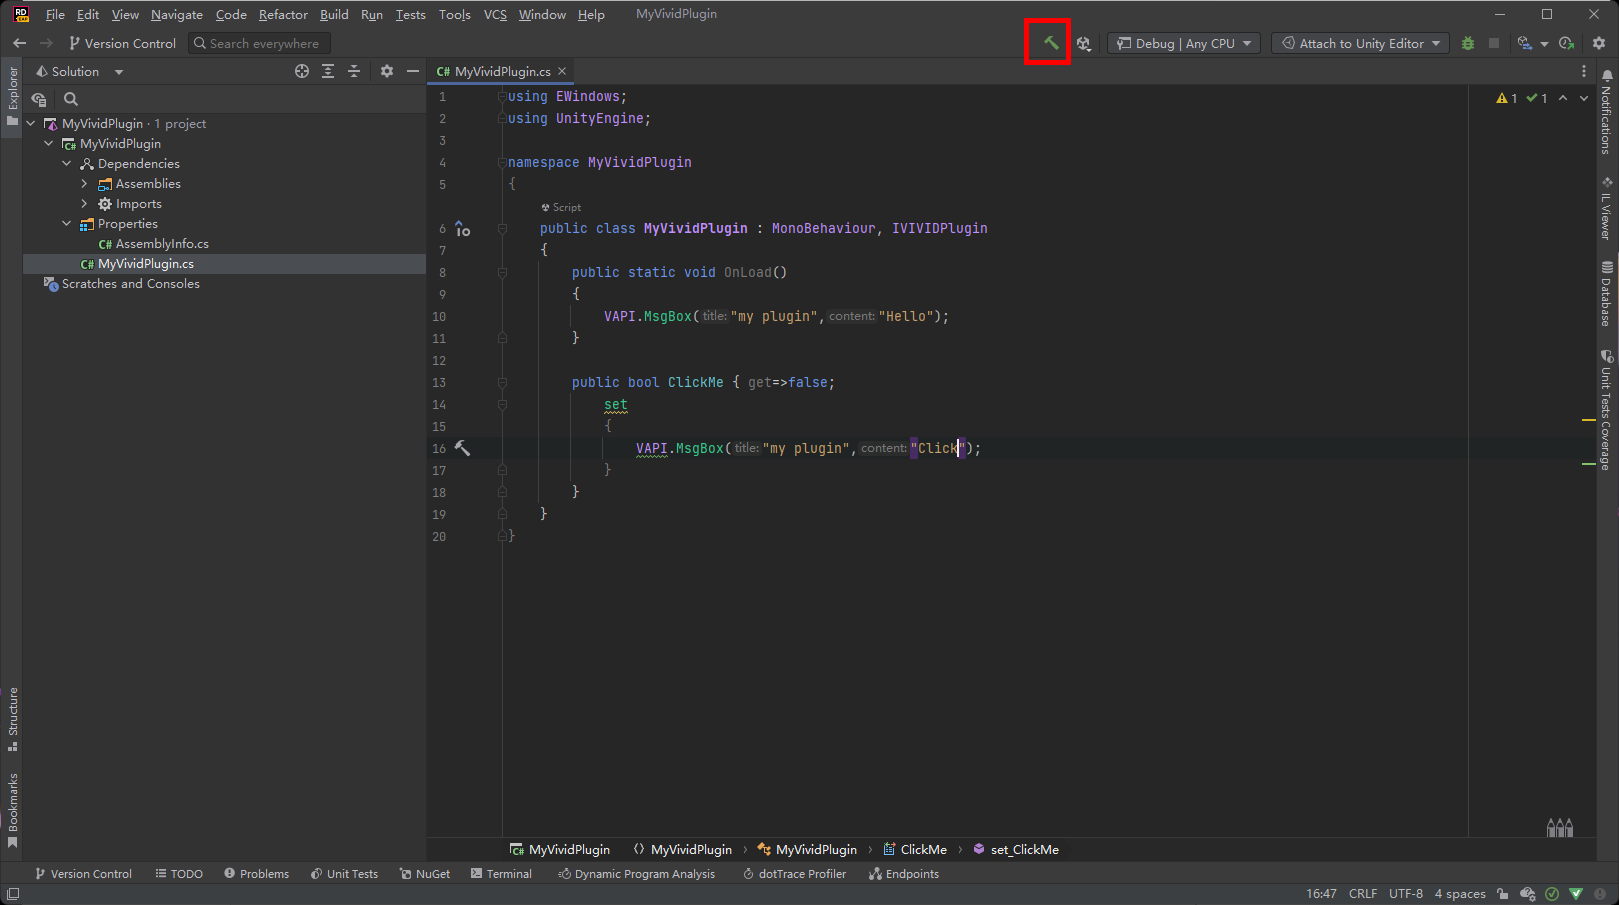
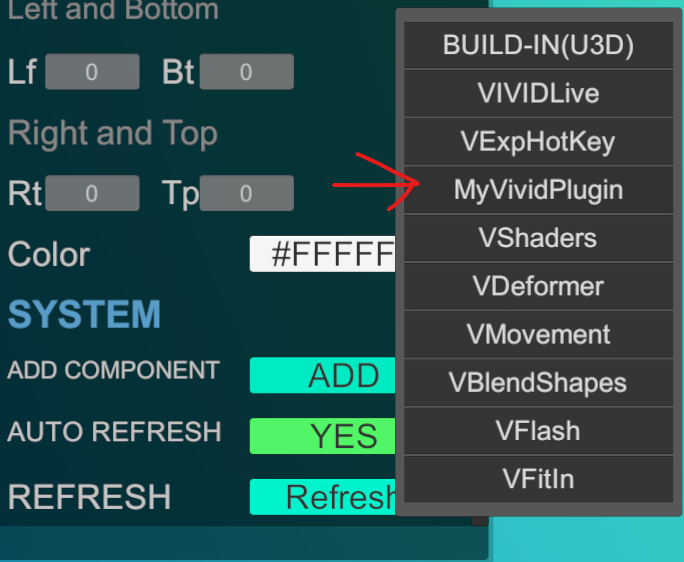
如果希望这个组件能在面板里的ADD COMPONENT列表里出现,需要继承自IVIVIDPlugin接口
如果继承自这个接口,当扫描到它的时候可以执行它的OnLoad静态方法(不写这个方法也没关系)
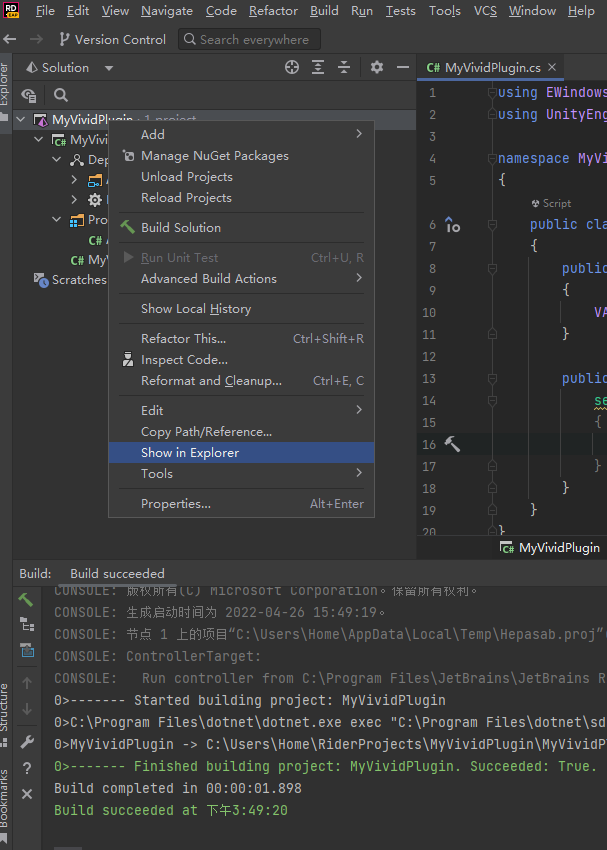
然后就可以和Unity应用一样了,写完后点击小锤子编译
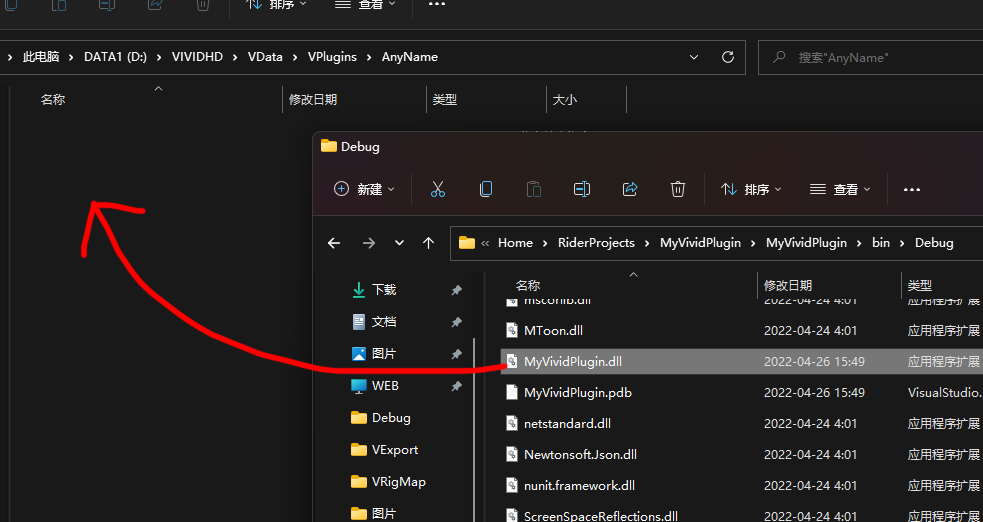
编译后来到这个目录,找到导出的文件 “你的项目名.dll”,这里我的是 MyVividPlugin.dll
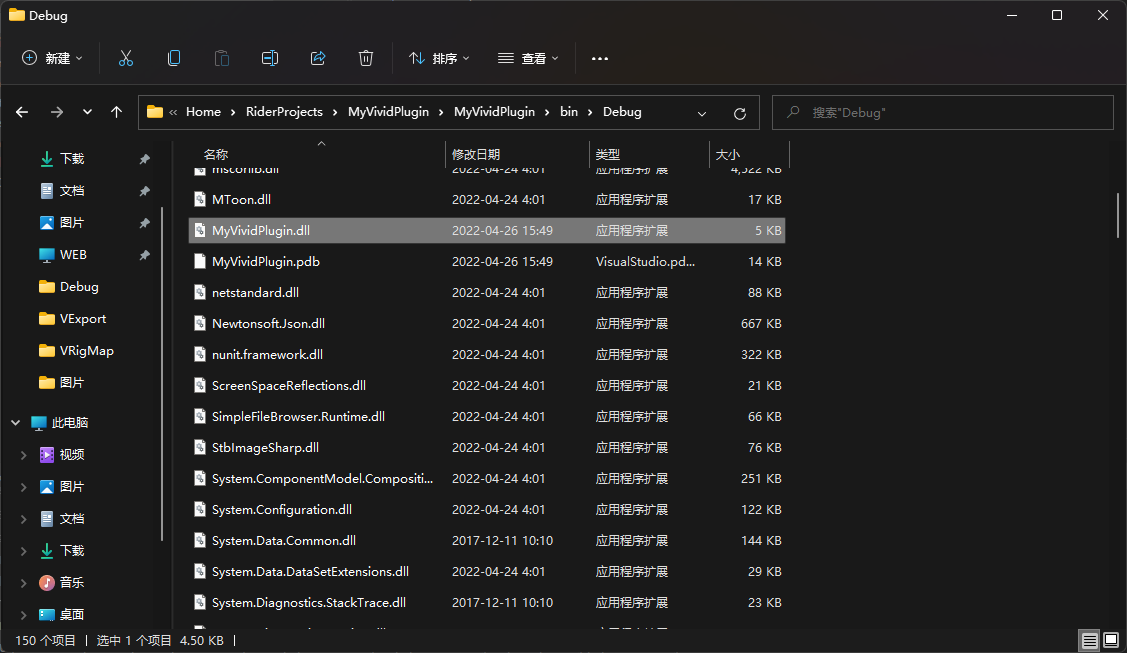
这个就是我们的插件了
接下来把这个插件挂载到VIVID里
首先来到VIVID文件夹内的VData文件夹内的VPlugins文件夹,在里面新建一个文件夹,名称随意
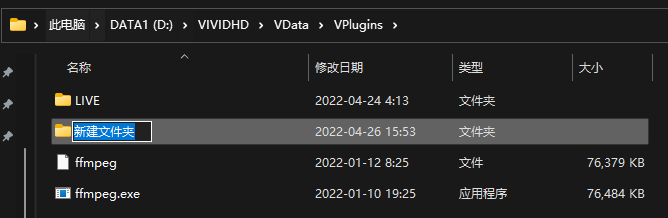
然后把刚才编译的插件导进来
然后重命名为main.dll
(在VIVID的HD版本之后,VIVID会寻找VPlugins内任意子文件夹内的“main.dll”文件作为插件加载,这么做是为了把不同插件用不同文件夹隔离开来,因为一个插件可能不仅仅是一个dll,还可能有其他的资源文件,比如LIVE插件就包含一个NodeJS的运行时)

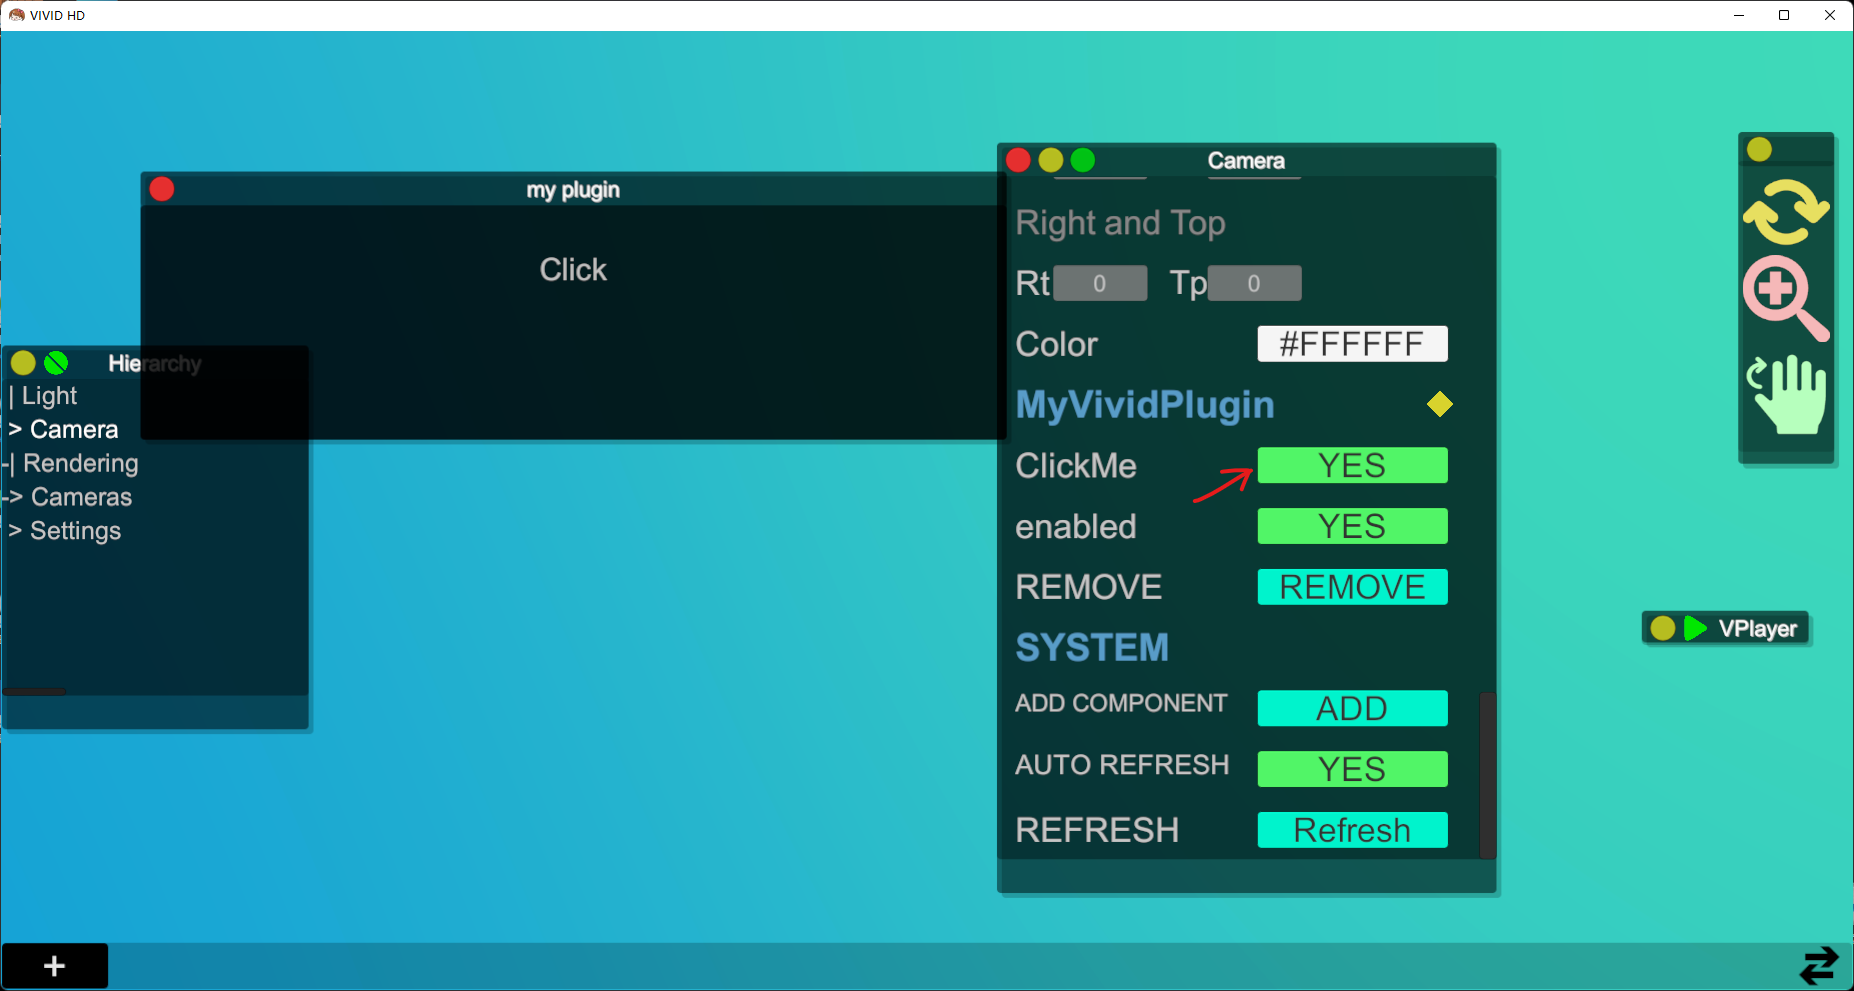
这样就可以了,加载我们写的这个新插件了,打开VIIVD,看到了插件输出的信息
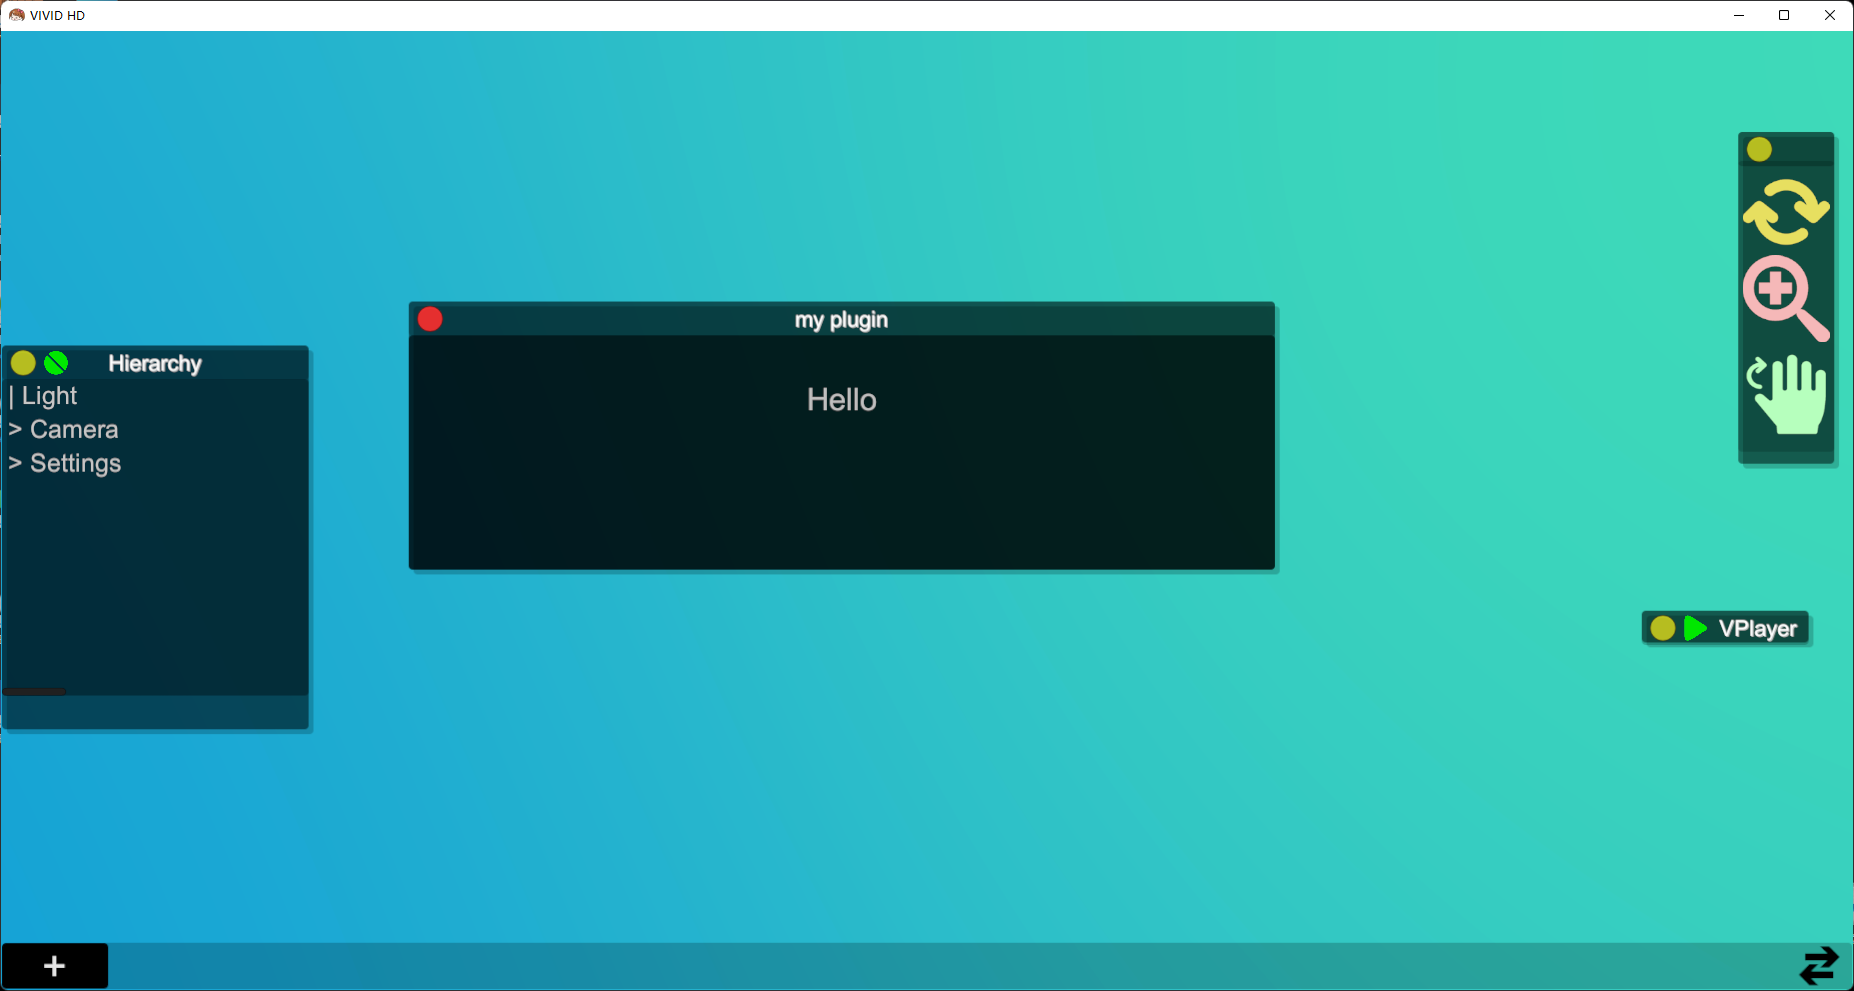
随便打开个面板,挂载这个组件
这是刚才给这个插件写的功能
附录 1
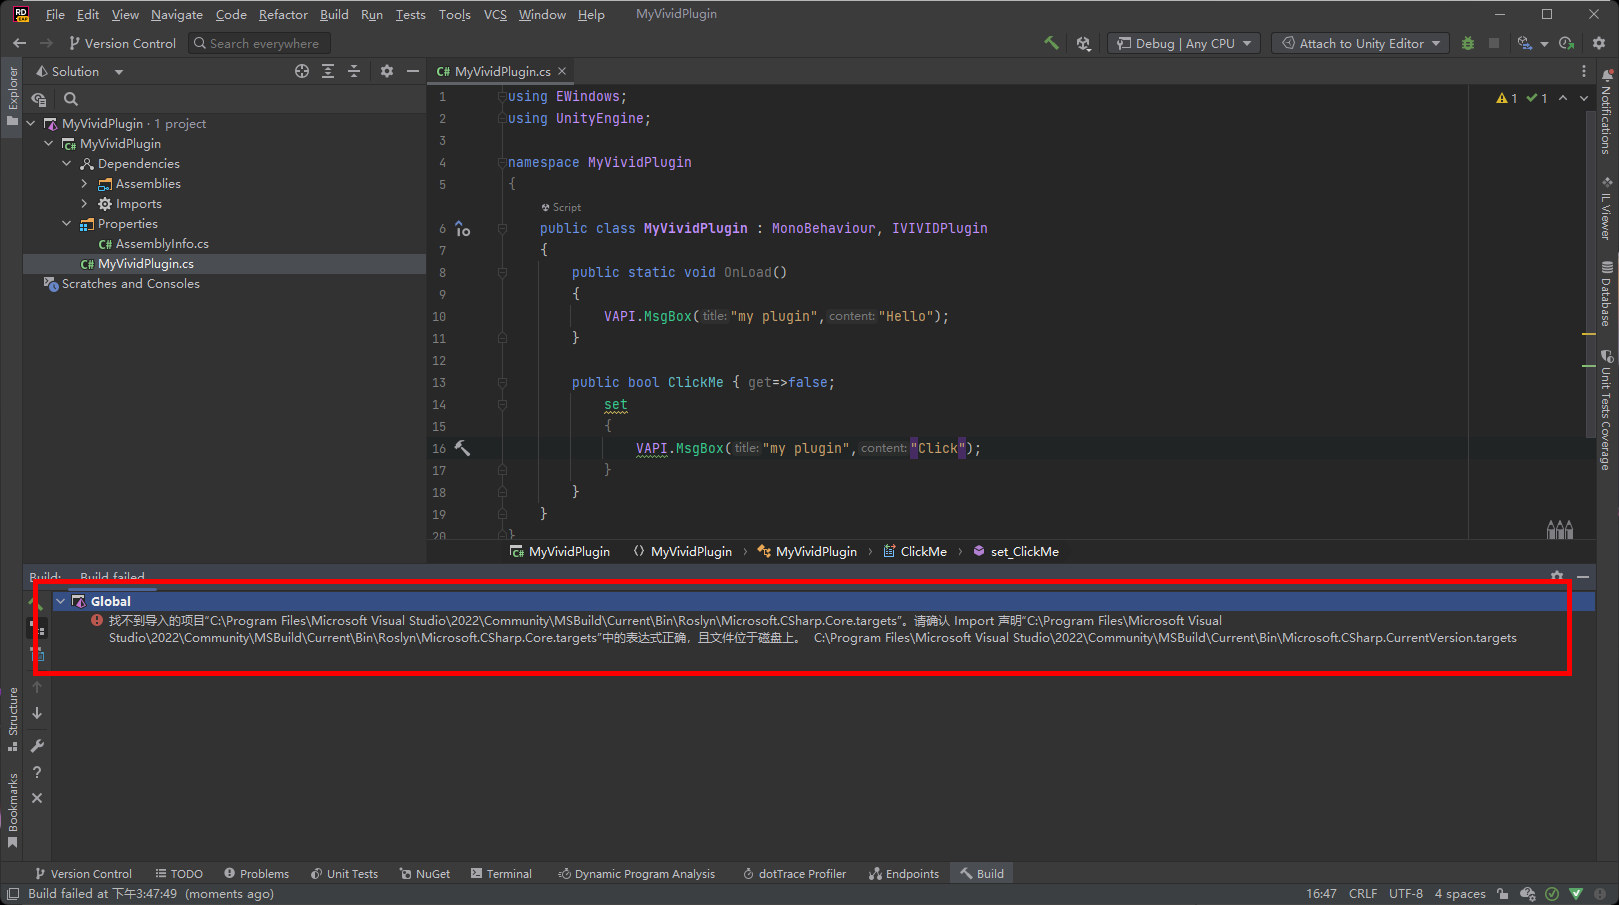
如果遇到无法编译的情况
在点过小锤子后,如果有报这样的错,通过简单的设置就可以修复
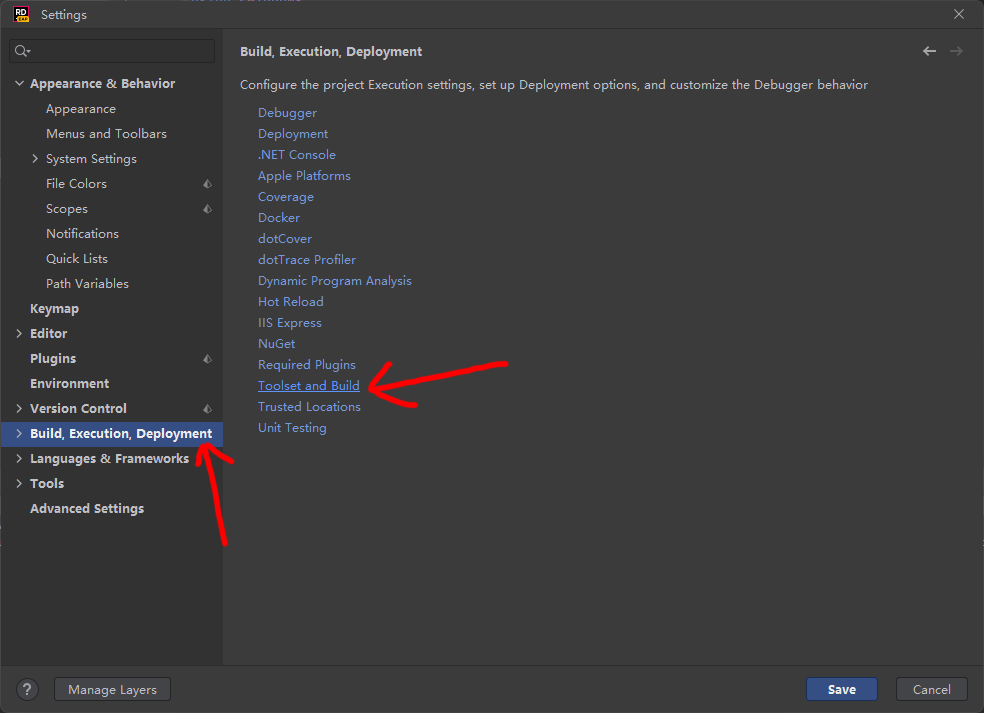
点击 File->Settings -> Build,Execution,Deloyment -> Toolset and Build
把MSBuild version改成dotnet的,或者其他能用的
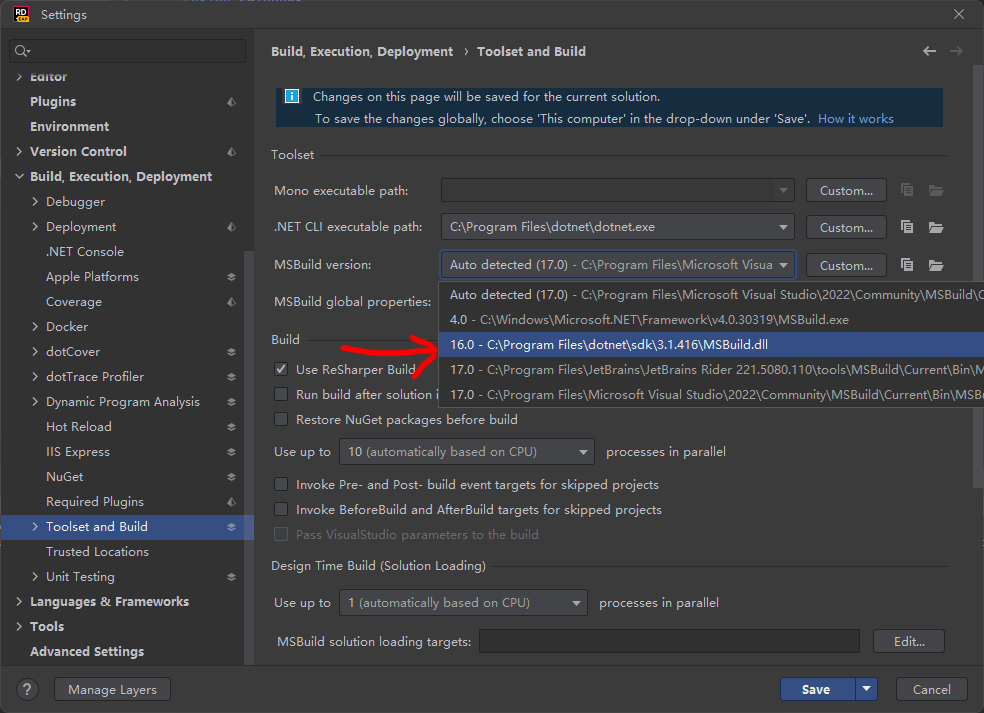
就可以了
附录 2
VIVID 提供的功能接口 VAPI
1 2 3 4 5 6 7 8 9 10 11 12 13 14 15 16 17 18 19 20 21 22 23 24 25 26 27 28 29 30 31 32 33 34 35 36 37 38 39 40 41 42 43 44 45 46 47 48 49 50 51 52 53 54 55 56 57 58 59 60 61 62 63 64 65 66 67 68 69 70 71 72 | public class VAPI { public static void AddMenu(Action action, params string[] menuPath) {} public static void SetUIVisible(bool state) {} public static void TransparentWindow(bool state) {} public static void ClickThrough(bool state) {} public static void OpenFile(Action<string> onSuccess) {} public static void SaveFile(Action<string> onSuccess) {} public static void ImportVrm(string path, Action<GameObject> afterImport) {} public static void ImportMmd(string path, Action<GameObject> afterImport) {} public static void ImportCustomAvatar(string path, Action<GameObject> afterImport) {} public static void Import3D(string path, Action<GameObject> afterImport) {} public static void ImportVideo(string path, Action<RenderTexture> afterImport) {} public static void ImportBackground(string path, Action<GameObject> afterImport) {} public static void ImportAnimationFrames(Dictionary<string, Dictionary<float, string>> data, Action afterImport = null) {} public static Dictionary<string, Dictionary<float, string>> ExportAnimationFrames() {} public static void ImportAnimationFramesJSON(string jsonData) {} public static string ExportAnimationFramesJSON() {} public static void NewLRCLayer(Action<VLRC> afterCreate) {} public static void NewWindow(string title, Vector2 pos, Vector2 size, Action<GameObject> afterCreate) {} public static void MsgBox(string title, string content, Action yesAction = null, Action noAction = null) {} public static void ImportAssetbundle(string path, Action<AssetBundle> afterImport) {} public static void SelectObject(GameObject obj) {} public static void RefreshHierarchy() {} public static void PlayAnimation(float time = 0) {} public static void StopAnimation() {} public static void AddOnLoadEvent(Action action) {} public static void RemoveOnLoadEvent(Action action) {} public static void AddOnQuitEvent(Action action) {} public static void RemoveOnQuitEvent(Action action) {} public static string Path {get;} public static string PluginPath {get;} public static string TranslationsPath {get;} public static string RigMapPath {get;} public static string ExportPath {get; set;} } |
具体使用参考GITHUB上开源的VIVID插件